How to Attach Wood Railing to Round Columns
These instructions are for attaching a wood railing to a round column using the Wood Rail to Round Column Hardware Kit. For a downloadable/printable version to take with you to the jobsite, click How To Attach Wood Railing to Round Columns PDF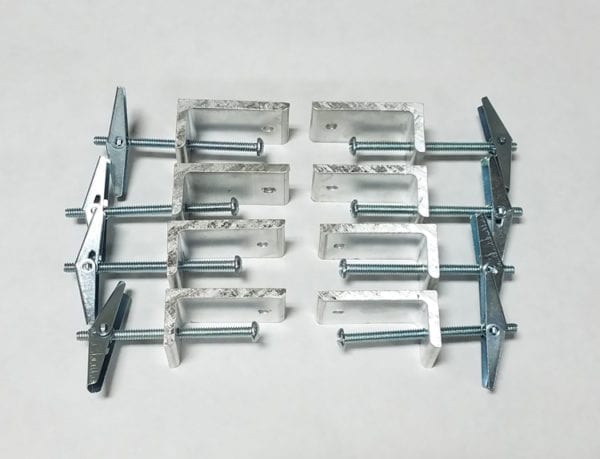 The Kit includes 8 aluminum brackets and 8 toggle bolts, enough to do BOTH ENDS OF THE RAIL. It works well with any of our 4″ or 6″ Rail Systems, or it can be used with most 2×4 or 2×6-based DIY porch or deck railings. The Rail to Column kit does not include the screws used for the assembling the rails with balusters. Those are in our Rail Installation Kit, which also includes instructions that go into more detail about putting together the rail, spindles, etc.
Complete this set of instructions before assembling the rails and spindles.
- Locate where the top and bottom brackets will be on the column.
- For a DIY railing, simply locate the brackets under the bottom of each rail piece.
- For American Porch’s Rail Systems, the top brackets are placed under the Sub-rail for the 4 and 3-piece Systems, or the top rail for the 2-piece System. The bottom brackets are placed under the Skirt for the 4-piece System, and under the Bottom Rail for the 3 or 2-piece Systems.
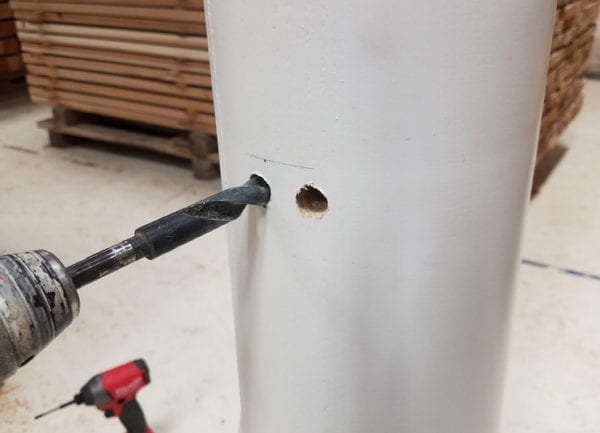
- Mark the center of where the rail will come into the column. Use one bracket on each side of that center-line. Holding the bracket in place, make a mark through the hole in the bracket.
- Drill a 9/16” hole through the wall of the column. This is the size needed to insert the wings of the toggle bolt.
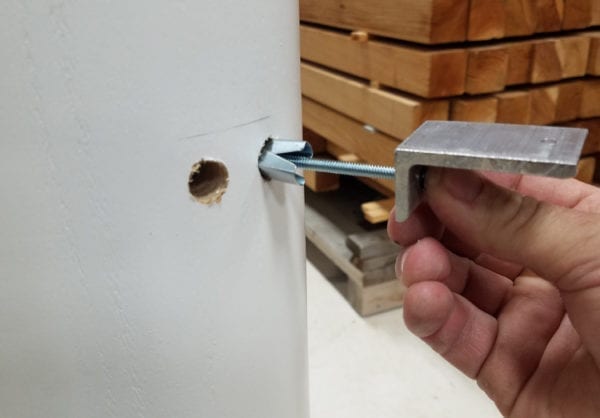
- Insert the bolt through the hole on the short leg of each bracket, then thread on the wings. Now push the toggle bolts through the holes and tighten in place to the column.
NOTE: on smaller diameter columns, you may find it advantageous to sand a small flat on the column to help the bracket sit flatter against it.
Install all top and bottom brackets in this manner.
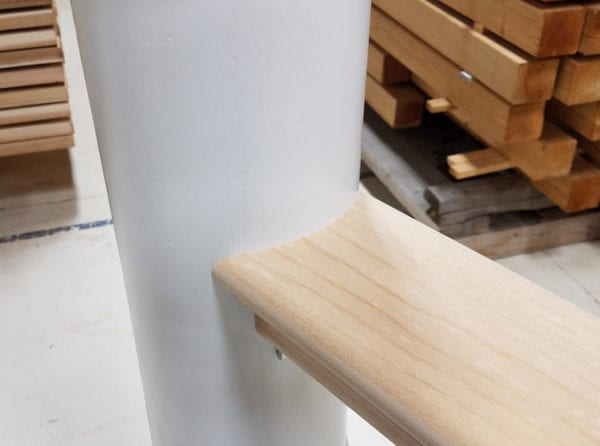
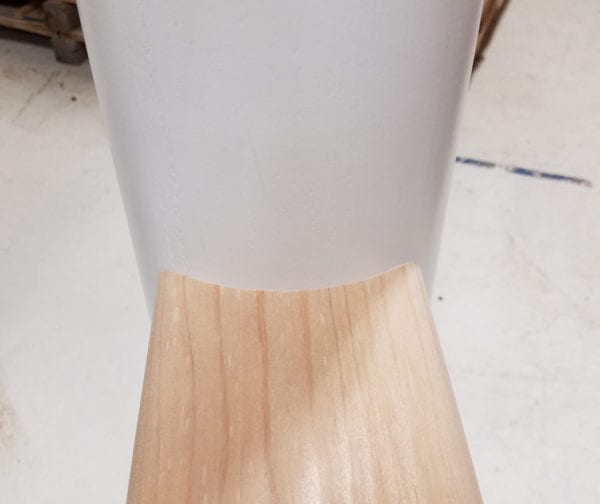
- Now put your rail against the column and scribe the shape of the column onto the rail. Cut the ends with a jig saw. Sand or rasp any imperfections in the cut. When cutting the second end, be careful to leave the rail long enough to account for the coping cut. Measure twice, cut once.
- You are now ready to assemble the rails and spindles as described in our Wood Balustrade Installation Instructions. Placing the assembled rails with cope cuts on each end between the columns can be a challenge. If your columns are tapered, you might be able to lift the assembly high enough and slide it down. If not, you may need to deviate from the balustrade instructions so that the rail pieces and spindles are assembled with the rails already in place between the columns.
A NOTE ON BOTTOM RAILS RUNNING INTO COLUMN BASES: Rather than trying to cut the shape of the column base into the end of the bottom rails, it’s usually better to cut out a section of the column base to receive the rail.